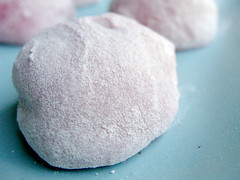
Despite the fact that my trip to Japan was many years ago, the sweet and fresh taste of Ichigo Daifuku still lingers on my tongue. I can still remember bringing this perfectly-shaped, white-dusted, pink treat up to my mouth with two hands, can still recall biting down, my teeth testing the soft give of mochi, then a sweet hit of anko, followed by an explosion of ripe strawberry. It was phenomenally good and I still wish that I could go back and eat more, to hold that taste in my mouth, just a little bit longer. Through the years, I’ve kept my eyes open for this particular treat, and though I would gleefully snatch this from the hand of a baby, I’ve not had even the hint of an opportunity to do so. And so I pretty much resigned myself to never eating this again.
Until I was browsing Smaku’s flickr one day.
Traditionally, mochi-making involves rice, pounding, steaming, kneading and all sorts of time and effort. Clearly though, Smaku did not do this. So I ran off to google mochi recipes and see how painful it was to make. I found Su-Yin‘s attempt and the recipe she used. This consisted of a few ingredients mixed together, some cling-wrap, and a few minutes – in a microwave! Really? That’s all? Well. Sign me up, then!
Of course, making the mochi was the easy part. Assembly, especially of the ichigo daifuku… let’s say frustrating and finicky are two f-words I didn’t actually use at the time.
Ingredients for Mochi
- 1/4 c Glutinous Rice Flour
- 1/4 c Water
- 2 tbsps of Sugar (optional)
- 3 drops of food colouring
Mix the water and flour (and sugar) until smooth in a microwaveable dish or bowl. Drop in food colouring. Tightly put cling wrap on bowl and microwave for 3.5 minutes on high. Time is totally dependent on your microwave though, so you may have to play with this a bit. Let cool. And there you go! Mochi!
Ingredients for Daifuku
- Mochi
- Fine Anko (Red Bean Paste)
- Potato Starch
Now, here comes the hard part. While the mochi is cooling, you’ll want to form 6 small rounds of anko, just less than an inch in diameter. Put them in the fridge. It helps. A little. Then set out a plate and put some potato starch in it for dusting (I was lazy and used rice flour). And a small bowl of water to dip your fingers into. By the time your mochi is cool enough to touch, you’ll want to wet your hands to more easily handle your very sticky mochi. Grab a piece, (about 1/6th of it), and work it into a flat disc. Do not expect things to be neat, as this will save your sanity. Drop your anko in the middle and start pulling the edges of mochi together. At some point, it felt like I was folding it into itself to get that nice, smooth appearance. Don’t work it too much. Once you’re happy with things, drop it into your plate of starch and roll it around. You can shape a bit more at this stage, but I’d advise against too much mashing, as more holes kept appearing for me. Set aside and only five more to go!
Ichigo Daifuku
- 4 Strawberries, de-stemmed
- Anko
- Mochi
Now, for a real challenge, you can try making the super tasty, ichigo daifuku. Cover your de-stemmed strawberries in a thin layer of fine anko paste and wrap away! I managed to get one that looked right, but not perfect. I’m not sure what it is about adding the strawberry that made my expertise from the three batches of regular daifuku the day before void and null, but I would suggest much practice before serving this to guests!!
All in all, I would make this again, as it’s not terribly complicated and aside from assembly, it’s very straight forward. Plus, I get to eat my coveted ichigo daifuku whenever I please.
[flickr-gallery mode=”photoset” photoset=”72157622153332406″]


